Reviving a 15-year-old netbook with Arch Linux
Arch Linux 32 on an Eee PC 1000HE
KO | EN
I still have a netbook I bought back in 2009.
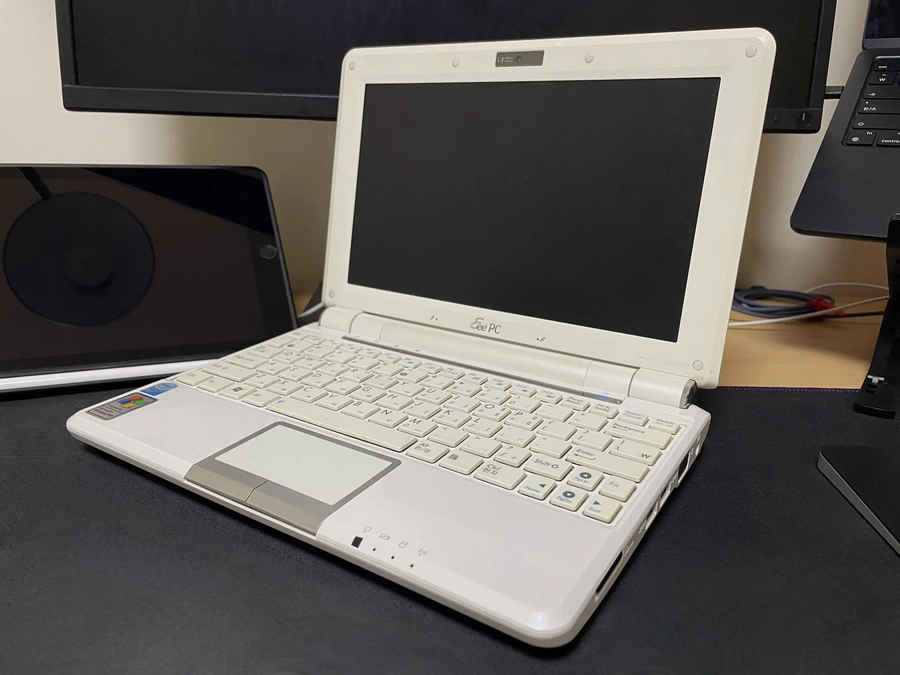
The ASUS Eee PC 1000HE has an Intel Atom N280 and 1GB of DDR2 RAM. The Atom N series was Intel’s line of cheap, low-performance CPUs for netbooks. The chip has 56KB of L1 cache and 512KB of L2 cache, and its clock speed is 1.667GHz. Compare that with the Intel Core i3 N305, a budget laptop processor released in 2023, which has 768KB of L1 cache, 4MB of L2 cache, and runs at 3.8GHz, and you get a feel for how poor the Eee PC’s performance is.
Those were the kinds of compromised specs that came with being a netbook, so there is not much point in complaining about how bad they were. Even at the time it was no match for a laptop, but it was still fine for light work like editing documents or browsing the web. By around 2012, though, it had become hard to use even for routine tasks. Programs kept gaining features, websites kept growing more interactive, and the netbook’s small HDD was aging. In the end, ultrabooks replaced netbooks.
And so the netbook went to sleep in storage.
A new operating system
More than ten years later, in 2023, I suddenly thought of the netbook again. The machine I pulled out of storage looked exactly as it had when it went in, and the tacky Windows XP UI that appeared after booting was just as I remembered it. It took several seconds just to open Windows Explorer, and the cursor stuttered while it loaded. I could not remember whether the machine had gotten even slower, or whether it had always been like this and I had once thought even this was fast. Once the netbook was out of storage again, I decided to bring it back to life and put it to use again, whether as a server or a YouTube machine.
My first thought was that Windows XP, whose support ended in 2014, had to go. Windows releases after Windows 7 required at least 1GB of RAM. Because the netbook had exactly 1GB of RAM installed, I figured I would need a lighter operating system if I wanted it to be pleasant to use. Ubuntu required at least 512MB of RAM, but when I had installed Ubuntu on low-spec laptops in the past, I had not found the performance especially good.
I needed an extremely light operating system with only the bare minimum. It had to come without unnecessary default features, and it had to let me build an environment from the ground up for this netbook alone. The answer was obvious. Arch Linux. Arch Linux is a Linux distribution built on the principles of simplicity, modernity, pragmatism, user centrality, and versatility. I had wanted to try Arch Linux for a while anyway, so it felt like a good chance. The fact that the setup process would teach me a lot about operating systems also made it a nice hobby to start right before the semester began.
Before installation
Arch Linux officially dropped support for the x86 architecture after 2017. The Atom N2xx processors support only 32-bit, so I had no choice but to use Arch Linux 32, which is maintained by the community. The installation process for Arch Linux 32 was not very different from the Arch Linux installation guide on the ArchWiki, but the machine’s limited performance led to some unexpected twists. In this article I want to record, in detail, my personal experience installing Arch Linux 32 on this netbook.
Preparing the boot media
First, I needed an Arch Linux disk image. On the Arch Linux 32 download page, I downloaded the image file (.iso) and the signature file (.sig), then used the gpg command to verify that the image had not been tampered with.
$ gpg --keyserver-options auto-key-retrieve --verify archlinux32-2023.03.02-i686.iso.sigIf everything checks out, create the boot media. I used Rufus on a Windows desktop to burn the ISO file I had downloaded to a USB drive. I then plugged the USB drive into the netbook, entered the BIOS (Basic Input/Output System), set USB as the first boot option, and rebooted. That makes the computer boot from the USB drive instead of the hard disk.
Connecting to the internet
The Arch Linux installation image uses zsh as its default shell. To install Arch Linux, the machine needs an internet connection. First check whether the network interfaces are up.
$ ip link
1: lo ... state UNKNOWN ...
   link/loopback 00:00:00:00:00:00 brd 00:00:00:00:00:00
2: enp3s0 ... state DOWN ...
   link/ether xx:xx:xx:xx:xx:xx brd ff:ff:ff:ff:ff:ff
4: wlan0 ... state UP ...
   link/ether xx:xx:xx:xx:xx:xx brd ff:ff:ff:ff:ff:ff
Here lo is the loopback interface. The loopback interface is a virtual network interface the system uses to connect to itself. The IP address 127.0.0.1 is the loopback address assigned to it. enp3s0 is the interface corresponding to the Ethernet device (en) on the motherboard’s PCI bus 3 (p3), slot 0 (s0). Ethernet is the standard for wired networking. wlan0 is the wireless LAN interface. Since I was going to connect over Wi-Fi, I checked that wlan0 was in the UP state. Next, use rfkill to check whether any interfaces are blocked.
$ rfkill
ID    TYPE         DEVICE             SOFT         HARD
0     wlan         eeepc-wlan         unblocked    unblocked
1     bluetooth    eeepc-bluetooth    unblocked    unblocked
2     wwan         eeepc-wwan3g       unblocked    unblocked
...
If a wired connection is available, you can just plug in a LAN cable. To connect over Wi-Fi, though, you have to use iwctl to scan for access points and connect manually. iwctl is the client program provided by iwd (iNet wireless daemon), the wireless network daemon made by Intel. The Arch Linux installation image ships with iwd by default.
$ iwctl

[iwctl]# device list
                          Devices
-----------------------------------------------------------
Name     Address              Powered    Adapter    Mode
-----------------------------------------------------------
wlan0    xx:xx:xx:xx:xx:xx    on         phy0       station

[iwctl]# station wlan0 scan

[iwctl]# station wlan0 get-networks
        Available networks
----------------------------------
Network name    Security    Signal
----------------------------------
iptime          psk         ****
iptime_2.4G     psk         ****

[iwctl]# station wlan0 connect iptime_2.4G
Type the network passphrase for iptime_2.4G psk.
Passphrase: ********

[iwctl]# exit
The netbook’s wireless card did not support 5GHz networks, so I had no choice but to connect to 2.4GHz. Finally, send a ping to archlinux32.org to make sure the internet connection is working.
$ ping -c3 archlinux32.orgSetting the system clock
Update the system clock. First enable NTP (Network Time Protocol), then check that the clock is correct. NTP is a protocol that synchronizes the system clock by receiving the correct time from a server. I explain it briefly in How railway timetables became Unix time.
$ timedatectl set-ntp true
$ timedatectl
Partitioning the disk
fdisk lets you check what disks are attached to the computer.
$ fdisk -l
Disk /dev/sda: 14.8 Gib, x bytes, x sectors
Disk model: Flash Disk
...
Disk /dev/sdb: 149.0 GiB, x bytes, x sectors
Disk model: ST9160410AS
...
sda is the installation USB, and sdb is the HDD inside the netbook, so I selected sdb.
$ fdisk /dev/sdbThe existing partitions had been set up for Windows. One HDD was split into a C drive and a D drive, and there was also an EFI partition and a recovery partition. I wanted to delete all of the old partitions, which I no longer needed, and set everything up from scratch. To do that, I first had to understand the system’s motherboard.
The motherboard’s ROM holds the firmware that runs first when the system receives power and initializes the hardware needed for booting. Broadly speaking, there are three kinds of firmware: BIOS, EFI (Extensible Firmware Interface), and UEFI (Unified Extensible Firmware Interface). EFI improved on BIOS, and UEFI improved on EFI, so recent hardware usually ships with UEFI. Older motherboards typically came with BIOS. Yet even though the Eee PC 1000HE clearly used BIOS, it still had an EFI partition. I later learned that the EFI partition existed not because the firmware was EFI, but to support the BIOS’s “Boot Booster” option[1]. When a computer powers on, the BIOS goes through POST (Power-On Self Test), which checks the system’s hardware before initializing it. That takes a few seconds. “Boot Booster” reduces boot delay by caching POST information in the EFI partition.
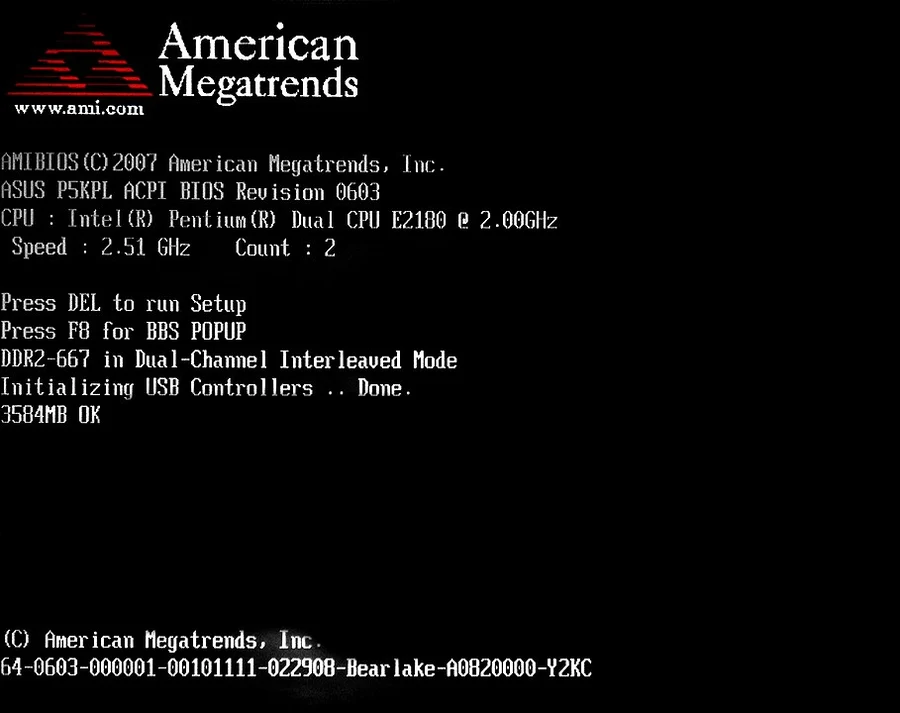 POST screen of the American Megatrends International BIOS. (CC0)
There are two partitioning schemes: MBR (Master Boot Record) and GPT (GUID Partition Table). MBR occupies the first 512 bytes of a storage device. Of those, 440 bytes hold bootstrap code, 6 hold a disk signature, 64 hold a partition table for up to four partitions at 16 bytes each, and the remaining 2 hold a boot signature. GPT, meanwhile, is a partitioning scheme that improves on many of MBR’s limits and is also part of the UEFI specification. Compared with MBR, GPT allows more primary partitions and larger partitions. Unlike MBR, it also uses a separate boot partition. I made two mistakes here. One was choosing MBR because I mistakenly believed[2] there was no way to use GPT with BIOS. The other was partitioning in an ordinary MBR layout like the one below without understanding what the EFI partition was for. I regretted it a little, but I did not bother setting it up again.
| Mount point | Partition | Partition type ID | Boot flag |
|---|---|---|---|
| [SWAP] | /dev/sdb1 | 82 (Linux swap) | No |
| / | /dev/sdb2 | 83 (Linux) | Yes |
A swap partition is needed when physical memory is insufficient and part of storage has to be used as memory. The ArchWiki recommends allocating at least 512MB to the swap partition. That is not enough. On this netbook, which has 1GB of RAM, if you keep the swap partition small you will run into “No space left on device” errors all the time. RHEL recommends allocating swap at twice the size of RAM when the system has 2GB of RAM or less. So on a netbook with 1GB of RAM, a 2GB swap partition would do. I gave it 4GB to be safe, though, because building from source can sometimes require more than 4GB of memory. Making the swap partition larger than main memory is also a good choice if you want to leave room for hibernation.
Command (m for help): n

Command action
e    extended
p    primary partition (1-4)
p

Partition number (1-4): 1

First sector (2048-y, default 2048): <enter>
Using default value 2048

Last sector, +sectors or +size(K,M,G) (2048-y, default y): +4G
Change the type of the swap partition you just created to 82 (Linux swap).
Command (m for help): t
Partition number (1-4): 1
Hex code: 82
Changed system type of partition 2 to 82
Next create the root partition. The root partition is where Arch Linux will be installed.
Command (m for help): n

Command action
e    extended
p    primary partition (1-4)
p

Partition number (1-4): 2

First sector (x-y, default x): <return>
Using default value x

Last sector, +sectors or +size(K,M,G) (x-y, default y): <return>
Using default value y
Finally, check the result.
Command (m for help): p
Disk /dev/sdb: 149.0 GiB, x bytes, x sectors
Disk model: ST9160410AS
...
Device       Boot    Start    End    Sectors    Size    Id    Type
/dev/sdb1            2048     y      z          4G      82    Linux swap / Solaris
/dev/sdb2            x        y      z          145G    83    Linux
As I will mention later, I did not set the boot flag because I was planning to use the GRUB bootloader. (GRUB ignores the boot flag.) Now save (w) and exit (q) fdisk.
Command (m for help): w
Command (m for help): q
Set the filesystem for the root partition. Since ext4 is generally used as a Linux filesystem, format sdb2 as ext4.
$ mkfs.ext4 /dev/sdb2Use mkswap to initialize the swap area created earlier as a swap partition, then activate it.
$ mkswap /dev/sdb1
$ swapon /dev/sdb1
Installation
Now the real installation begins. Mount the root partition on /mnt so you can access the partition where Arch Linux will be installed.
$ mount /dev/sdb2 /mntNext install the essential packages. pacstrap installs packages into the mounted root directory. Use it to put the Linux kernel, modules, and firmware files into /mnt. But if you try to install packages immediately, you will get an error saying the signatures cannot be trusted. First you need to use Arch Linux’s package manager pacman to install Arch Linux 32’s PGP keyring, archlinux32-keyring.
$ pacman -S archlinux32-keyring
$ pacstrap -K /mnt base linux linux-firmware
Once the installation finishes, generate the fstab file. The fstab file contains information about filesystems such as disk partitions and allows the system to mount them automatically at boot according to the configuration. genfstab, which comes with the Arch Linux installation image, generates the fstab contents automatically.
$ genfstab -U /mnt >> /mnt/etc/fstabChroot into /mnt.
$ arch-chroot /mntFrom this point on, you should think of yourself as being inside the Arch Linux system, with /mnt now acting as the root directory.
System configuration
First, link the timezone file under /usr/share/zoneinfo to /etc/localtime to set the local timezone. I chose ROK so the system would use Korean Standard Time.
$ ln -sf /usr/share/zoneinfo/ROK /etc/localtimeUse hwclock to set the hardware clock from the system clock. This updates the timestamp in /etc/adjtime.
$ hwclock --systohcGenerate the locale files.
$ locale-genSet the hostname.
$ echo eee-pc-1000he > /etc/hostnameSet the root account’s password.
$ passwdThat takes care of the basic configuration.
Bootloader configuration
When the computer powers on, the BIOS performs POST and initializes the hardware needed for booting. Right after that, it executes the first 440 bytes of the disk that is set as the first boot option in the BIOS. The MBR bootstrap code in that area launches the bootloader. The bootloader then loads the kernel and starts the operating system[3]. There are several bootloaders, but I chose the familiar GRUB. GRUB supports BIOS, MBR, and ext4, so it was a good fit for the environment I had.
You can install GRUB with pacman just as you would any other package. But if you try to install it right away, you will get an error saying the signatures cannot be trusted, so as before, install archlinux32-keyring first.
$ pacman -S archlinux32-keyring
$ pacman -S grub
Install GRUB by specifying the boot disk. Note that the /dev/sdb passed as an argument is the disk, not a partition.
$ grub-install --target=i386-pc /dev/sdbGenerate the GRUB configuration file.
$ grub-mkconfig -o /boot/grub/grub.cfgAt boot, the GRUB installed in /boot/grub will load the Arch Linux kernel vmlinuz-linux under /boot. At this point you could say the Arch Linux installation is finished, but before rebooting you still need to set up the network.
Network configuration
If you skip the network setup here, you may end up after installation unable to connect to the internet, completely stranded. I decided to stick with the same simple combination used by the Arch Linux installation image: systemd-networkd + systemd-resolved + iwd. systemd-networkd is a system daemon that manages network configuration, and it includes the files needed for wired networking. First write the wired adapter configuration.
$ cat <<EOF > /etc/systemd/network/20-wired.network
[Match]
Name=enp3s0

[Network]
DHCP=yes
EOF
Write the wireless adapter configuration as well. The IgnoreCarrierLoss option makes systemd-networkd keep the current interface configuration briefly while the system is roaming to another access point. By ignoring the short interruption during roaming, it can reduce downtime.
$ cat <<EOF > /etc/systemd/network/25-wireless.network
[Match]
Name=wlan0

[Network]
DHCP=yes
IgnoreCarrierLoss=3s
EOF
systemd-resolved provides DNS services. Configure it by linking stub-resolv.conf.
$ ln -sf /run/systemd/resolve/stub-resolv.conf /etc/resolv.confThe only package that needs to be installed separately for wireless networking is iwd.
$ pacman -S iwdWrite the iwd configuration file as well. When EnableNetworkConfiguration is true, iwd configures the network interface with an IP address. If the address is dynamic, it obtains it through its built-in DHCP client. I explain how DHCP works in The very concrete principle of how the internet works. The NameResolvingService option sets how DNS resolution is handled. systemd is the default anyway.
$ cat <<EOF > /etc/iwd/main.conf
[General]
EnableNetworkConfiguration=true

[Network]
NameResolvingService=systemd
EOF
Write the hosts file. When DNS resolves an IP address from a domain name, this file is checked first.
$ cat <<EOF > /etc/hosts
127.0.0.1   localhost
::1         localhost
127.0.1.1   eee-pc-1000he
EOF
Enable the network services so they start automatically when the system boots.
$ systemctl enable iwd systemd-networkd systemd-resolvedExit the chroot.
$ exitAfter installation
At last, the installation was over. Unmount the partitions mounted under /mnt.
$ umount -R /mntShut the system down and reboot. At this point, enter the BIOS, change the first boot option from USB to the hard disk, and remove the USB drive. The computer will now boot from the system installed on the hard disk. Select Arch Linux 32 in GRUB and the operating system will start. After that I logged in as root and installed the packages I needed.
$ pacman -S coreutils sudo which git wget openssh neovim tmux fishI also referred to Arch Linux’s General recommendations and applied the various suggestions there.
Arch User Repository
AUR (Arch User Repository) is a community-run repository separate from Arch Linux’s official package repositories. Sometimes the package you need is in AUR rather than an official repository. Installing packages directly from AUR involves a cumbersome process, so it is much easier on the nerves to use a helper that automates AUR-related work and gives you a friendlier interface.
Using the Pacman wrappers yay or paru, you can install packages from AUR almost as easily as you use pacman. Either one is fine, but neither provides x86 binaries, so you have to build it yourself.
$ sudo pacman -S --needed base-devel
$ git clone https://aur.archlinux.org/paru.git
$ cd paru
$ makepkg -si
Even with 4GB allocated to swap, I ran into a “No space left on device” error during the build. If you ignore it and start the build again, it resumes from the build data it cached just before, so you can still finish the build successfully.
Desktop environment
Arch Linux does not come with a desktop environment (DE), so you have to set one up yourself. A DE provides GUI elements such as icons, toolbars, and wallpapers along with a window manager (WM), which makes it easy to build a GUI environment.
GNOME is a well-known DE, but the netbook needed a lighter one. I chose LXQt, the successor to LXDE (Lightweight X11 Desktop Environment), which is known for being lightweight. LXQt runs on the X Window System (X11, or just X). X11 provides a framework for GUI environments and follows a client-server model. The display server, called the X server, receives events from input devices and passes them to clients through the X protocol. Here, “clients” means all the layers sitting on top of the server, from user applications like browsers to the DE, the window manager, and toolkits such as GTK and Qt. When a client that has received input events sends GUI requests to the server, the server draws the screen on the output device accordingly[4].
 The X11 server-client model. (Wikimedia Commons, CC BY-SA 3.0)
These days Wayland, which was designed to improve on X11’s problems and fit modern kernels better, is taking its place, but I decided to install X11 so I could use LXQt. The xorg package includes the X11 server and various utility packages. xorg-xinit is a program that lets you start the X11 server manually with the startx command. I installed LXQt and an icon set along with them.
$ pacman -S xorg xorg-xinit lxqt breeze-iconsThe startx command initializes an X11 session according to the contents of the .xinitrc file in the home directory. If there is no .xinitrc file in the home directory, it refers to /etc/X11/xinit/xinitrc instead. To set things up differently per user, copy the default xinitrc file into the home directory.
$ cp /etc/X11/xinit/xinitrc ~/.xinitrcThe default configuration is set to run Twm, xorg-xclock, and Xterm. Delete all of that and add exec startlxqt. Then add a script to .profile so that logging in starts the X11 session automatically.
if [ -z "${DISPLAY}" ] && [ "${XDG_VTNR}" -eq 1 ]; then
  exec startx
fi
I installed Firefox and tried running it in LXQt. The netbook was struggling.

Since I wanted to use the netbook as a server, I set it up so LXQt would start only when I logged in with the *-desktop account, and otherwise the system would stay in the CLI. If needed, I could have the DE start all the time, or install packages to enable more of LXQt’s features.
RAM upgrade
The Eee PC 1000HE uses a 1GB DDR2 SO-DIMM RAM module. DDR2 is an SDRAM interface standardized in 2003, followed by DDR3 in 2007, DDR4 in 2014, and DDR5 in 2020. A DIMM (Dual In-line Memory Module) is a RAM stick with several memory chips mounted on a single PCB. SO-DIMM (Small Outline DIMM) is a standard that cuts a DIMM’s length roughly in half so it can be used in smaller devices.
Since I kept running into out-of-memory errors while building source with 1GB of RAM, I decided the first thing I needed was a RAM upgrade. But the netbook’s Intel Atom N280 processor supported only up to 2GB of RAM. Half wondering whether anyone still sold DDR2 at all, I ordered a 2GB stick for about $5.30. (Shipping was about $2.30.)
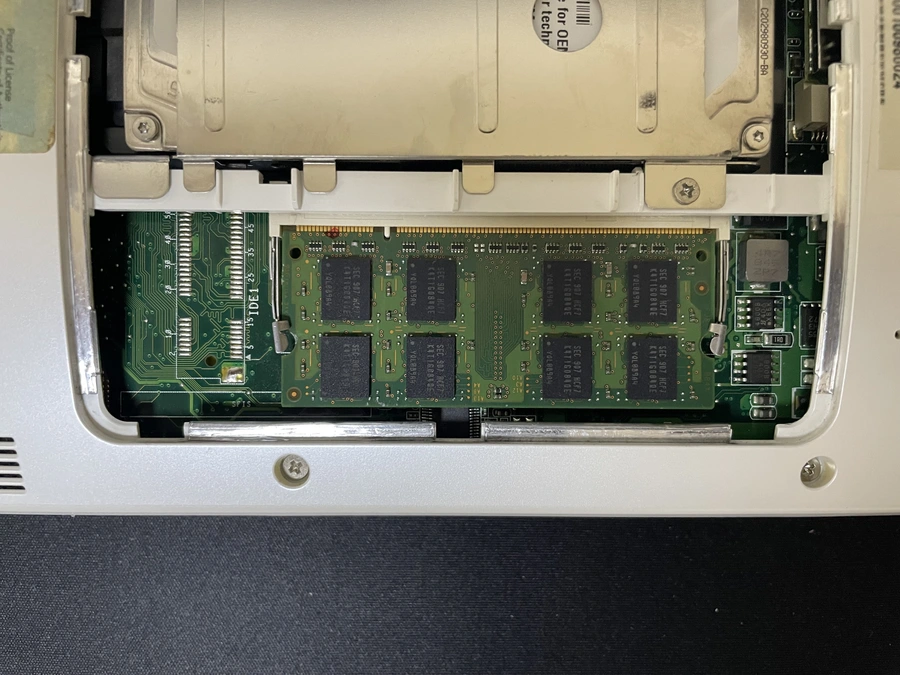
After replacing it with the new RAM, I checked that the system recognized it.
$ free -h
         total ...
Mem:     1.9Gi ...
Swap:    4.0Gi ...
I did not expect much, and because the bottlenecks were the HDD and CPU I did not feel any noticeable performance improvement. Still, it occurred to me that it might be fun to take the netbook completely apart and start replacing its hardware piece by piece.